|
 Peg holes
#19879
05/24/09 11:30 AM Peg holes
#19879
05/24/09 11:30 AM
|
Joined: Apr 2009
Posts: 235
Thane O'Dell
 OP
OP
Member
|
|
OP
Member
Joined: Apr 2009
Posts: 235 |
What kind of tools, jigs or methods are you guys using to accurately put holes in tennons and mortises so that when you assemble them they line up and have the correct draw. This seems to be something I need to improve on. I raised two Run-in sheds
this weekend and I was not impressed with my peg holes.
Thane
Life is short so put your heart into something that will last a long time.
|
|
|
 Re: Peg holes
[Re: Thane O'Dell]
#19880
05/24/09 12:28 PM Re: Peg holes
[Re: Thane O'Dell]
#19880
05/24/09 12:28 PM
|
Joined: Nov 2003
Posts: 1,124
Mark Davidson
Member
|
|
Member
Joined: Nov 2003
Posts: 1,124 |
It definitely helps to have a 1/2 or 3/4 tapered rasp on hand when learning to drill peg holes, as then you can repair the bad stuff.
Generally I lay out the holes on the mortises only, then drill using a ship auger(aprox 16" long) and two rafter angle squares to guide the drill, something else that works as a drill guide is the square corner of a 4x4 block.
Once I'm happy with the fit of a frame, I reach in through the mortise peg hole with my auger and prick the tenon(two spins backwards).
After the frame comes apart again the tenons are drilled off center to create the draw. It helps to actually measure 1/8 closer to the tenon shoulder rather than eyeballing it.
Don't be discouraged, this is a hard part of timber framing.
|
|
|
|
Re: Peg holes
[Re: Mark Davidson]
#19881
05/24/09 02:02 PM
|
Joined: Mar 2008
Posts: 570
OurBarns1
Member
|
|
Member
Joined: Mar 2008
Posts: 570 |
Don Perkins
Member, TFG
to know the trees...
|
|
|
|
Re: Peg holes
[Re: Mark Davidson]
#19882
05/24/09 02:04 PM
|
Joined: Dec 2007
Posts: 1,882
TIMBEAL
Member
|
|
Member
Joined: Dec 2007
Posts: 1,882 |
I drill the majority of my peg holes horizontally, I can brace the drilling devise this way better than from the top. I zero out the combo square and use it to square the long bit in two directions, with it set and braced against my leg I commence drilling through the first side of the mortice, I realign the bit on the other side of the mortice with the square a second time and let it go.
I did use my Boss boring machine for some 1" holes and was very pleased with the results, now all I need is a 3/4" bit for the Boss, maybe a second machine just for pegging.
I recently tried the mirror with the hole in the middle, I found the chips obscure the view and I was lost after that. I need to play with it some more.
Tim
|
|
|
|
Re: Peg holes
[Re: TIMBEAL]
#19883
05/24/09 02:12 PM
|
Joined: Mar 2008
Posts: 570
OurBarns1
Member
|
|
Member
Joined: Mar 2008
Posts: 570 |
Don Perkins
Member, TFG
to know the trees...
|
|
|
|
Re: Peg holes
[Re: OurBarns1]
#19885
05/24/09 03:39 PM
|
Joined: Jan 2008
Posts: 918
bmike
Member
|
|
Member
Joined: Jan 2008
Posts: 918 |
big fan of the speed square to check for parallel with the drill bit. once you practice a bit you'll not need to stop the drill, just adjust as you go.
daiku's mirror is another great idea - but i haven't tried it yet.
also, for mortises you can drill first...
or you can drill after you get the mortise cut and cleaned up - the latter will allow a bit of adjustment if you get off course... i prefer the former method.
|
|
|
|
Re: Peg holes
[Re: bmike]
#19886
05/24/09 05:16 PM
|
Joined: Dec 2007
Posts: 1,882
TIMBEAL
Member
|
|
Member
Joined: Dec 2007
Posts: 1,882 |
If you are using a boring machine to clean the mortice don't bore the peg hole first, you will run out of wood, the feed screw is using, in that hole and it could be a bugger.
Tim
Last edited by TIMBEAL; 05/24/09 05:16 PM.
|
|
|
|
Re: Peg holes
[Re: Thane O'Dell]
#19888
05/24/09 06:08 PM
|
Joined: Apr 2009
Posts: 235
Thane O'Dell
OP
Member
|
|
OP
Member
Joined: Apr 2009
Posts: 235 |
Hmmm... sounds like everyone has there method that works for them. I,m certainly not interested in doing pre-assembly. I have been using the speed square and wood parralels up this point but have to admit that I could be more careful. Drilling straight hole is not my problem. I think the drill bit may be wondering on occation without my noticing. Spotting the location with a small bit(say 5/32) before entering with the auger may help.
Also, a jig that slips into the mortise up against the notch and has a side plate with pilot holes for the spotting drill. This jig would verify the mortise size as well as spotting the peg hole. If most of mortises we do are standard sizes, 1.5x5.5 and 2x7.5),then this should work. Having been a Tool & Die maker makes me think this way.
Am I out to lunch or what?
Thane
Life is short so put your heart into something that will last a long time.
|
|
|
|
Re: Peg holes
[Re: Thane O'Dell]
#19889
05/24/09 08:51 PM
|
Joined: Mar 2008
Posts: 570
OurBarns1
Member
|
|
Member
Joined: Mar 2008
Posts: 570 |
I think the drill bit may be wondering on occation without my noticing. Spotting the location with a small bit(say 5/32) before entering with the auger may help.
Thane When using an auger bit, I would argue against "piloting" the hole first. Pilot holes typically work well w/ twist bits only, not augers. just my 2-cents.
Don Perkins
Member, TFG
to know the trees...
|
|
|
|
Re: Peg holes
[Re: OurBarns1]
#19897
05/25/09 02:17 PM
|
Joined: Mar 2002
Posts: 1,687
Jim Rogers

Member
|
|
Member
Joined: Mar 2002
Posts: 1,687 |
Thane:
Pre-assembly is the best method to insure your peg holes are correctly laid out to draw bore the frame together. And to insure that your frame is true to the desired dimensions or the dimensions on the plan.
It is standard procedure to test fit every joint to be sure that on raising day everything goes together correctly.
At that time, we usually have the hole through the mortise already bored. Then, as mentioned above, run the bit into the mortise's peg hole and let the lead screw tip, mark its location on the tenon. After, disassemble the joint and move this location to create the draw bore.
With most tenons the peg hole will be moved closer to the shoulder to create the adequate draw bore needed.
Whatever you do, have fun doing it!
|
|
|
|
Re: Peg holes
[Re: Jim Rogers]
#19907
05/25/09 11:55 PM
|
Joined: Apr 2009
Posts: 235
Thane O'Dell
OP
Member
|
|
OP
Member
Joined: Apr 2009
Posts: 235 |
Thanks Jim
When two people tell me the same thing, there must be something to it. I will try this on the Cabana I'm building next week. I will let you know how it goes at the end of june when it gets raised.
Thane
Life is short so put your heart into something that will last a long time.
|
|
|
|
Re: Peg holes
[Re: Thane O'Dell]
#19908
05/26/09 12:46 AM
|
Joined: Nov 2006
Posts: 850
mo
Member
|
|
Member
Joined: Nov 2006
Posts: 850 |
remember when drilling without a guide, that you tend to have the drill a little out of plumb towards the driller. you can sight one axis but it hard to sight the other. a friend at the end of the stick can help.
as far as lay-out don't forget that the framing square is indeed handy off the edge of the timber. the tongue 1 1/2" the blade 2"
and don't blow out like I did yesterday.
hope all goes well. post some pics if you get a chance.
mo
|
|
|
|
Re: Peg holes
[Re: mo]
#19916
05/26/09 10:45 AM
|
Joined: Dec 2007
Posts: 1,882
TIMBEAL
Member
|
|
Member
Joined: Dec 2007
Posts: 1,882 |
I hold back on the drill and as soon as the feed screw, which is pulling the bit through the wood, runs out of wood it stops, no blow out. You might have to push through a knot or pitch pocket but not clear wood. Blow out does happen on occasion, that is life, as thoughts wonder.
Tim
|
|
|
|
Re: Peg holes
[Re: Jim Rogers]
#19979
05/29/09 02:48 PM
|
Joined: Oct 2002
Posts: 209
Will B
Member
|
|
Member
Joined: Oct 2002
Posts: 209 |
Thane,
While I agree with Jim that pre-assembly is the "best" way to insure that your joinery will work and your peg holes are correctly laid out, it is by no means standard procedure or necessary. It is unlikely that a small shop or solo operation will have the time, room or means to pre-assemble joinery. We never pre-assemble and prick for draw except for scarf joints or in scribe rule, where you need the room for the assembly anyway for layout. In square rule, if your joinery is well done you should be able to layout for the peg hole on the mortise and then measure and offset the drawbore on the tenon without ever putting the joint together. The framing square is the tool to use, 1.5" or 2" off the shoulder in most cases. With experience you should become confident in your ability to cut and measure accurately. Large or inexperienced shops may pre-assemble because they don't have that confidence. Pre-assembly takes a lot of time that can be better used elsewhere. The drawbore on the tenon should be in the direction you want the mortised piece to go as the peg is driven. In some pieces such as rafter peaks and braces, the drawbore will be in two directions to bear against two shoulders.
|
|
|
|
Re: Peg holes
[Re: Will B]
#19980
05/29/09 03:04 PM
|
Joined: Jan 2008
Posts: 918
bmike
Member
|
|
Member
Joined: Jan 2008
Posts: 918 |
The drawbore on the tenon should be in the direction you want the mortised piece to go as the peg is driven. In some pieces such as rafter peaks and braces, the drawbore will be in two directions to bear against two shoulders. I usually visualize this by sliding the prick for the tenon peg hole towards the shoulder, along the length of the timber. Will - I'm not sure I understand moving it in 2 directions. For example - on a typical brace, if you slide the hole towards the shoulder this will pull the brace diagonally into the housing - butting it against the horizontal and vertical surface (effectively pulling into the corner of the housing). Sliding along the diagonal (length of the timber) effectively gives you a vertical and horizontal adjustment. I agree (in theory) on the 2 part adjustment on a some rafters - you'd want to slide the peg hole so that it pulled into the shoulder and the face of the housing - but wouldn't you then want to do this on ALL pieces so that you didn't actually bore holes that forced a horizontal timber to 'hang' on the pegs? Thane - it gets easier with practice, and as Will notes - many frames with carefully executed joinery need not be pre-assembled just for the sake of peg holes. But, if you add splines and scarf joints or scribing into the mix - and you'll have to decide what is the most effective practice for your project. As an aside - be sure that your pegs are sized appropriately to the size of the tenon and that tenons have appropriate relish behind them - if you over draw bore or use too big a peg in proportion to the joinery you can blow the relish.
Last edited by bmike; 05/29/09 03:05 PM.
|
|
|
|
Re: Peg holes
[Re: bmike]
#19985
05/29/09 04:33 PM
|
Joined: Dec 2007
Posts: 1,882
TIMBEAL
Member
|
|
Member
Joined: Dec 2007
Posts: 1,882 |
Exceptions to every rule. I am a small shop, I don't pre-assemble, unless I for see issues. I do see with more people in the shop there could be problems as Will points out.
The brace is simple, the two directions are toward the shoulder and away from the butt end.
As an option, any one not pegging braces? You could use 10 minutes per brace all tolled, for each brace, will it save time? Or is it worth it.
Tim
Tim
Last edited by TIMBEAL; 05/29/09 04:34 PM.
|
|
|
|
Re: Peg holes
[Re: TIMBEAL]
#19986
05/29/09 04:45 PM
|
Joined: Jan 2008
Posts: 918
bmike
Member
|
|
Member
Joined: Jan 2008
Posts: 918 |
The brace is simple, the two directions are toward the shoulder and away from the butt end.
I agree, I guess I never thought of it in '2' directions, just 1, along the length of the timber. Move it 1/16" or 1/8" depending on size / etc. and go.
|
|
|
|
Re: Peg holes
[Re: bmike]
#19987
05/29/09 06:08 PM
|
Joined: Apr 2009
Posts: 235
Thane O'Dell
OP
Member
|
|
OP
Member
Joined: Apr 2009
Posts: 235 |
To preassemble or not to preassemble, this is the question. If a method can prove to be reliable then I would prefer not to. My normal method has been to use parralels 1 1/2 to 1 3/4 to make lines offset from shoulders and faces. I think the problem I was having was grabing the wrong parralel. Too many tools on the table... must put away tools not in use!
You can also offset the peg holes in a tie beam so that they pull in and down. This will ensure there is no wieght on the peg after the tennon has shrunk. Does this make sense?
Life is short so put your heart into something that will last a long time.
|
|
|
|
Re: Peg holes
[Re: Thane O'Dell]
#19988
05/29/09 07:13 PM
|
Joined: Oct 2002
Posts: 209
Will B
Member
|
|
Member
Joined: Oct 2002
Posts: 209 |
Mike, you're right to say that my 2 directions is really one, into the corner. I think of it as drawing along the resultant vector of aligning it towards both shoulders. It's not always along the grain or length (in braces it is; rafter peaks, no). We don't bother with drawing to both shoulders on minor members or where bearing isn't an issue, but will offset (more than just drawbore) the peg towards the side we don't want shrinkage to occur at if that's an issue.
And yes, Thane, we usually offset the tie beam drawbore both in and down.
|
|
|
|
Re: Peg holes
[Re: Will B]
#19994
05/29/09 11:07 PM
|
Joined: Mar 2002
Posts: 1,687
Jim Rogers
Member
|
|
Member
Joined: Mar 2002
Posts: 1,687 |
....it is by no means standard procedure or necessary. Will: When I first started timber framing, I didn't do fit ups to test my joints or mark my tenon's peg holes. And I found that my tenon peg hole layout wasn't the best, at times. Then I joined the guild and went to many guild raising. There I learned that this was the procedure used, especially at the raising for the forest service in NH. Was that procedure at that raising a one of a kind thing? Just curious.....
Whatever you do, have fun doing it!
|
|
|
|
Re: Peg holes
[Re: Jim Rogers]
#19997
05/29/09 11:55 PM
|
Joined: Jan 2003
Posts: 106
Ray Gibbs
Member
|
|
Member
Joined: Jan 2003
Posts: 106 |
  Here is neat little rig that will give you a perfect offset every time. I know some guys use these "offset pricks" regularly. I picked up mine at Cressing during the Frame conference from "The Windy Smithy". What I really like is that it also leaves a nice round indent to show where the hole would be without the offset which I find eliminates the dreaded push-bore mistake.
|
|
|
|
Re: Peg holes
[Re: Ray Gibbs]
#19999
05/30/09 01:31 AM
|
Joined: Mar 2008
Posts: 570
OurBarns1
Member
|
|
Member
Joined: Mar 2008
Posts: 570 |
Nice jig Ray. I remember reading somewhere in one of these peg threads, I think it was Joel McCarty, who said these can be made of wood w/ a snipped off brad for a pointer. I'd want to have some sort of indexer on the hammer end-- maybe a cross-hairs to aid in aligning which way the "draw" is going to pull... (psst, Jim Rogers, looks like a tool you should be offering!!  )
Don Perkins
Member, TFG
to know the trees...
|
|
|
|
Re: Peg holes
[Re: OurBarns1]
#20003
05/30/09 10:20 AM
|
Joined: Jan 2003
Posts: 106
Ray Gibbs
Member
|
|
Member
Joined: Jan 2003
Posts: 106 |
It's hard to see but the other end has a flat ground into it that you orient towards the shoulder.
|
|
|
|
Re: Peg holes
[Re: Jim Rogers]
#20006
05/30/09 01:34 PM
|
Joined: Oct 2002
Posts: 209
Will B
Member
|
|
Member
Joined: Oct 2002
Posts: 209 |
Guild events would be a prime example of the "confidence" issue I mentioned earlier, Jim. Get 30-40 strangers who have never worked together before under one system and I would want to check things out thoroughly before a very public (usually) raising where we want to keep delays to minimum. So pre-fit might be standard for Guild events, but not for the industry as a whole.
|
|
|
|
Re: Peg holes
[Re: Jim Rogers]
#20007
05/30/09 02:05 PM
|
Joined: Apr 2002
Posts: 895
daiku
Member
|
|
Member
Joined: Apr 2002
Posts: 895 |
Not everyone draw bores, as there are costs (time) and risks (relish blow-out) as well as rewards. The old timers did not have ratchet straps and come-alongs.
And not everyone pre-assembles everything. If you are confident in your design and your joinery, then it becomes less necessary, IMO. Of course any problem you find and correct in the shop will save you time and money in the field. That has to be weighed against the time spent test-fitting in the shop. We compromise, and test-fit the tricky stuff in the shop. For example, king trusses with struts always seem to be sensitive to even small inaccuracies in layout and cutting. CB.
--
Clark Bremer
Minneapolis
Proud Member of the TFG
|
|
|
|
Re: Peg holes
[Re: daiku]
#20013
05/30/09 09:06 PM
|
Joined: Mar 2002
Posts: 961
Ken Hume
Member
|
|
Member
Joined: Mar 2002
Posts: 961 |
Hi Clark,
One of the earliest and simplest devices that can be used to pull and hold a frame together is the Spanish windlas. This is nothing more than a loop of rope and a stick but it can pull tons. This device, in combination with a prop and scotch, was also used to right buildings that had sunk as a result of rotted sills.
Regards
Ken Hume
Looking back to see the way ahead !
|
|
|
|
Re: Peg holes
[Re: Ken Hume]
#20015
05/30/09 09:40 PM
|
Joined: Jan 2008
Posts: 918
bmike
Member
|
|
Member
Joined: Jan 2008
Posts: 918 |
My limited understanding of a Spanish Windlas (lass? / less?) would not make it at all practical for raising or even pre-assembling a timber frame, much less operating one while balancing on a girt or ladder to pull in a wall or bent. Perhaps historically there would have been use... I've seen cabled versions in PA barns used to hold the walls together, and seen versions anchored to the ground to keep ag. buildings from tipping over. Here's an etching I found: 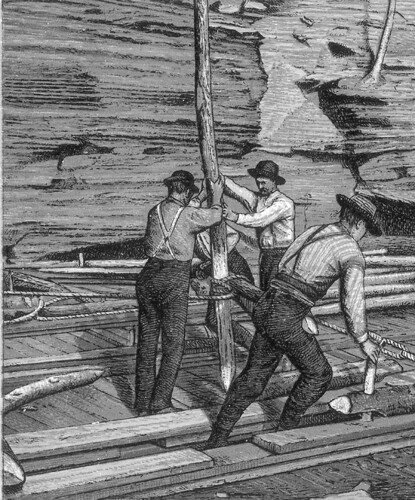 And what is a scotch? I prefer mine with a sliver of ice. A bit smokey with a fiery finish, and just a hint of earthy tones.
Last edited by bmike; 05/30/09 09:41 PM.
|
|
|
|
Re: Peg holes
[Re: bmike]
#20017
05/31/09 08:28 AM
|
Joined: Mar 2002
Posts: 961
Ken Hume
Member
|
|
Member
Joined: Mar 2002
Posts: 961 |
Hi Mike,
Your illustration, though interesting, is not of a Spanish windlas in action.
During frame assembly a simple loop of rope is placed around the wall plate and sill and then a stick is inserted in the middle of the loop and the stick is then wound round like a propellor and as it does so the rope tightens and gradually starts to pull the plate and sill together. The stick should be positioned eccentrically such that when left unattended it touches the ground and stops itself from unwinding. Short pieces of plank with rounded edges should be inserted at either end of the loop to protect the top face of the wall plate and underside of the sill to stop the rope from crushing the aris and also to stop the rope from being cut by the aris.
For buildings that are standing but have subsided on one side, a scotch, notch or dap (ref. Truax) can be cut cut into the face of a post on the slumped side towards the top of the post and into this a prop is placed at an angle resting on a slider plank at ground level. A peg is inserted into and through the prop part way up its length. The brick or daub panels in the wall are knocked out and then the rope loop is inserted around the prop and under the peg, passing through the wall and across to the other side of the building where it is then wrapped around the opposite post / side girt connection point. The stick is inserted through the loop and then the operator starts winding the loop till all slack is gone at which point as the rope tightens further the building will begin to right itself. This is sometimes done along the building in multiple places to ensure an even lift. Invariably when one sees scotch marks in the outside upper face of posts the first thing to do is look down and see if the sill is gone and has been underbuilt in brick or stone or alternatively if a new sill has been inserted. I have seen one cottage where the front wall is now 10" shorter than the rear because the front posts have been cut short to get back into good wood, new tenons cut and then a new sill inserted and underbuilt in brick.
I did not mention raising (in contrast with righting) in my previous post, though I see no reason why this could not be achieved provided a tandem lift was employed on either side of a frame that allowed for slackening and swaping the rope loops for shorter ones as the lift progesses. Props should be inserted under the frame to hold the frame in a fixed position whilst change out and wind up proceeds.
I might have some pictures of me using a Spanish windlas somewhere but these would have been taken during the pre digi pic era so don't hold your breath.
Regards
Ken Hume
Looking back to see the way ahead !
|
|
|
|
Re: Peg holes
[Re: Ken Hume]
#20025
05/31/09 04:49 PM
|
Joined: Jan 2008
Posts: 918
bmike
Member
|
|
Member
Joined: Jan 2008
Posts: 918 |
Thanks Ken. The image came up for a search and is from a library of historical photos. My understanding of the lass is just as you describe - a loop of rope with a board wound round and wound. Seems you'd have to be pretty smart about it for pulling bents together - you'll be slightly blocked off the deck, maybe the thickness of a 2x, and you will need to place the loop high enough so as not to pull the bottoms of the posts in - as most 'modern' frames are not raised as a unit with a sill, typically dropping into holes or location notches on a conventionally framed floor deck. No doubt that it would work - but you'd have to have a custom length of rope, no? And what type of rope would you need - I read somewhere of synthetics being horrible for this purpose as they store too much energy and will snap back at you. While I feel this might work, and has worked (certainly seen this in use in boat building and woodworking) I still see it impractical for a timber frame - while you might not pull up a bent with this method - pulling two bents or walls together with this method would be tedious - a come along and straps gives the operator nearly precise control of the pull - allowing splines, tenons, etc. to be fit as things come together. Fascinating for sure. But here is where I'll side with technology (mechanical advantage and control of the come along) over rope and a stick. I'd be curious to see those pics. My Googling didn't show much of large scale work - save for that image. Here's a few more:   
|
|
|
|
Re: Peg holes
[Re: bmike]
#20037
06/01/09 11:27 AM
|
Joined: Dec 2007
Posts: 1,882
TIMBEAL
Member
|
|
Member
Joined: Dec 2007
Posts: 1,882 |
Gosh darn it, has anyone seen the come alongs? Yea, on the shop floor, but we do have the bag of rope and some planks.
We have used them for minor clamps during raisings.
It could get you out of a bind. We should all try one, once in a while, it could be one more tool in the bag of tricks. Rope is easily adjustable to any length. I wouldn't be so quick to disregard old technology, otherwise, we would be building with steel posts and beams.
Tim
|
|
|
|
Re: Peg holes
[Re: TIMBEAL]
#20038
06/01/09 11:47 AM
|
Joined: Jan 2008
Posts: 918
bmike
Member
|
|
Member
Joined: Jan 2008
Posts: 918 |
Gosh darn it, has anyone seen the come alongs? Yea, on the shop floor, but we do have the bag of rope and some planks.
We have used them for minor clamps during raisings.
It could get you out of a bind. We should all try one, once in a while, it could be one more tool in the bag of tricks. Rope is easily adjustable to any length. I wouldn't be so quick to disregard old technology, otherwise, we would be building with steel posts and beams.
Tim What kind of rope would you always have on hand? I'm curious as to what rope would work best. And I'm not disregarding old technology - but assuming you remember to bring the come alongs to a raising - I think they are a superior choice for pulling bents and walls and small cars out of ditches, etc. (actually, tow trucks and all terrain fork lifts are better at pulling cars, but a come along has worked in a pinch) But, show me some photos, some video - some something of how it is done, how easy it is, how simple to rig, how effective - and I'm game for adding to that pile of known unknowns that I'm becoming famous for. That said - I've worked a raising with only 1 come along - all the joinery went together with the draw bore on the pegs. The come along and straps were used as a safety on the last bent that we had to raise from the edge of the deck. (everything was done by hand...)
Last edited by bmike; 06/01/09 11:50 AM.
|
|
|
|
Re: Peg holes
[Re: bmike]
#20043
06/01/09 03:04 PM
|
Joined: Mar 2008
Posts: 570
OurBarns1
Member
|
|
Member
Joined: Mar 2008
Posts: 570 |
Don't forget the humble turnbuckle. Can't be that modern of a device.
Don Perkins
Member, TFG
to know the trees...
|
|
|
|
|


