|
 Das Riegelhaus Project
#24271
08/23/10 11:01 PM Das Riegelhaus Project
#24271
08/23/10 11:01 PM
|
Joined: May 2010
Posts: 946
D L Bahler
 OP
OP
Member
|
|
OP
Member
Joined: May 2010
Posts: 946 |
Das RiegelhausThis is a general topic about the project that I am working on, and hopefully it will also be a discussion about Central European and German timber framing. The project is a timber framed shop with dimensions of approximately 14'x24'. The building will have 2 levels, and the upper level will have a full wraparound balcony that extends about 4 1/2 feet from the exterior walls. The roof will be a 12/12 pitch with an excessively huge overhand of over 6 1/4 feet. The framing of the roof will leave a large open area in the attic for storage or whatever else it may be useful for. In addition to a stairway inside the structure, there will also be at least one stairway on the outside with direct access to the balcony. The roof is framed to have a half hip at both ends, and will also have at both ends a rounded gable projection known as a Ründi that serves to protect the gable from wind and rain, and also adds a decorative element. 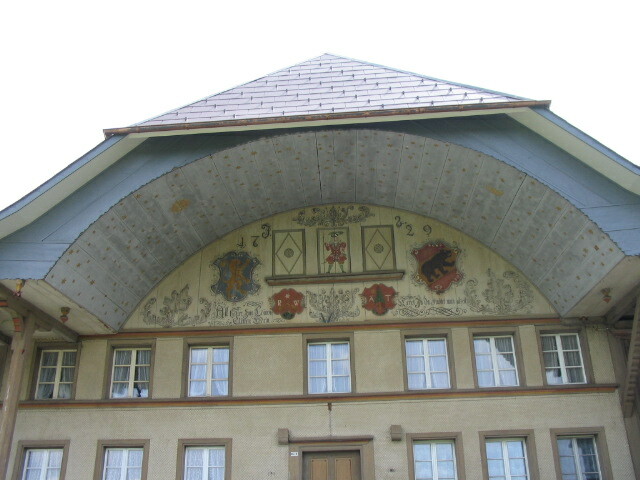 a Ründi a RündiThe building shall be framed according to the south Germanic and Central European tradition. More details on that later. The exterior shall be clad with boards, likely horizontal boarding with vertical board and batten on the gables. The inside will have a plaster finish with the timbers left exposed. I have here some drawings I have made of the building plan (produced using geometry) Part of the reason for this is to open up the plan to your evaluation. This style of framing is different than what we are used to. The timbers on these types of building are typically sized with dimensions from 4 to 7 or 8 inches. Quite a bit smaller than we would use, but they use more of them spaced closer together. These building are NOT bent framed, but are framed as wall units with a roof then added on top. Sort of like stick framing in that the walls are framed as individual frameworks, only better. First, a front elevation showing framing of the gable end  And a side elevation showing wall framing and some roof framing  The roof braces are not necessarily shown in their correct locations on this drawing, and there will be x bracing between the purlins that is not show here. This is just to give an idea how the roof is framed together And finally a drawing of the interior roof framing, showing a Liegender Dachstuhl truss supporting pulins which in turn support common rafters. (Thanks to Ken Hume for leading me in the right direction as to what this style of truss is called)  I like the German word for a truss, which is Dachstuhl, which basically means 'roof chair' Rafter are spaced 2' O.C., all joists are spaced 4' O.C. Side wall posts are 6' O.C., end wall posts are about 7' O.C. I realize that this drawing does not show the locations of doors or windows. I have not yet decided where to place them. Their locations will have an effect on the placement of posts and other framing members. Here is a picture showing the details of typical Germanic framing:  Some terms: Verzapfung: Mortise and tenon Verblattung: Lap joint Verkämmung: Comb joint, a special German joint category. More later Strebe: Brace (Kopf=head, Fuss=foot) Schwelle: sill Rähm: Top plate Deckenbalken: Joists Gefach: Panel (hence the word fachwerk) Reigel: Rail Lehmstaken/Flechwerk: Infills (kind of a simplified translation) Ständer: Post Eckverbindung: Corner joint
|
|
|
|
Re: Das Riegelhaus Project
[Re: D L Bahler]
#24272
08/24/10 01:44 AM
|
Joined: Nov 2006
Posts: 850
mo
Member
|
|
Member
Joined: Nov 2006
Posts: 850 |
Hi DL, Are you not building standers under the balcony? It seems like the load at the eaves coming down the post to the cantilever would be a concern. I'm no engineer but it just looks top heavy to me. No offense, just my view. 
|
|
|
|
Re: Das Riegelhaus Project
#24275
08/24/10 02:34 AM
|
Joined: May 2010
Posts: 946
D L Bahler
OP
Member
|
|
OP
Member
Joined: May 2010
Posts: 946 |
It does indeed look top heavy, but reviewing the buildings it is modeled after, they too look top heavy. Very Top heavy  like this, or  This one looks wildly top heavy or this much larger one 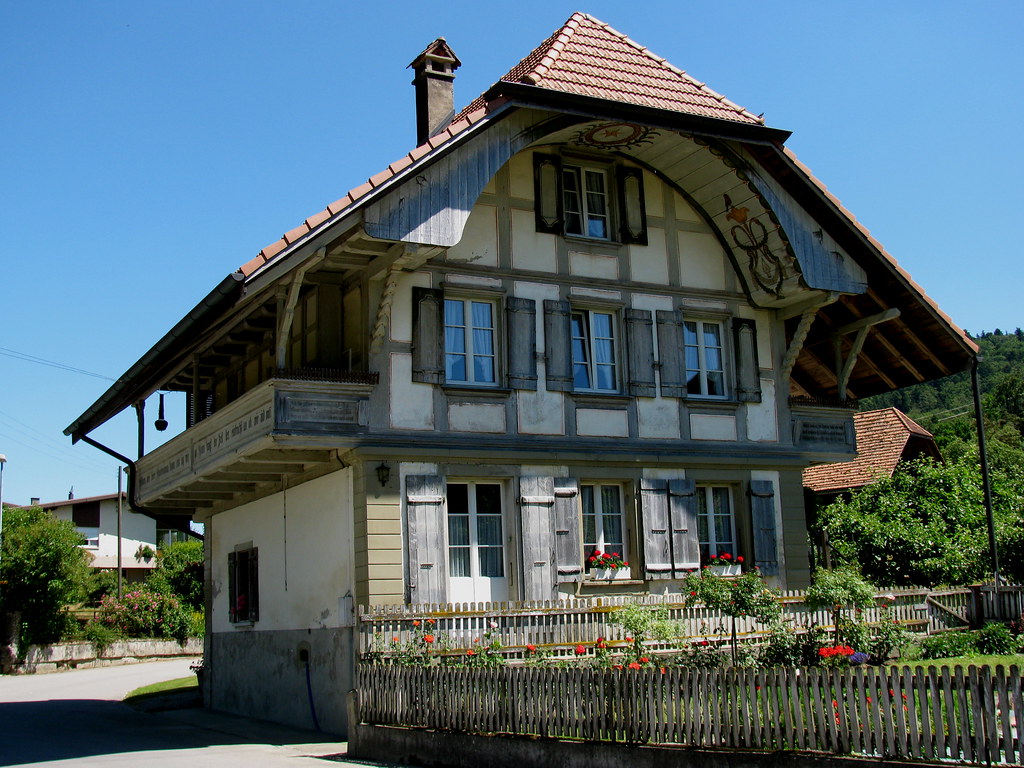 That doesn't even have any braces under the balcony! This matter concerned me a lot while I was working on the design, but I have found very few examples of the authentic buildings posting the balconies. Not that the beams which support the balconies are also the floor joists, so these timbers run from one balcony all the way through the other, making them quite long (in this building, about 23 or 24 feet) 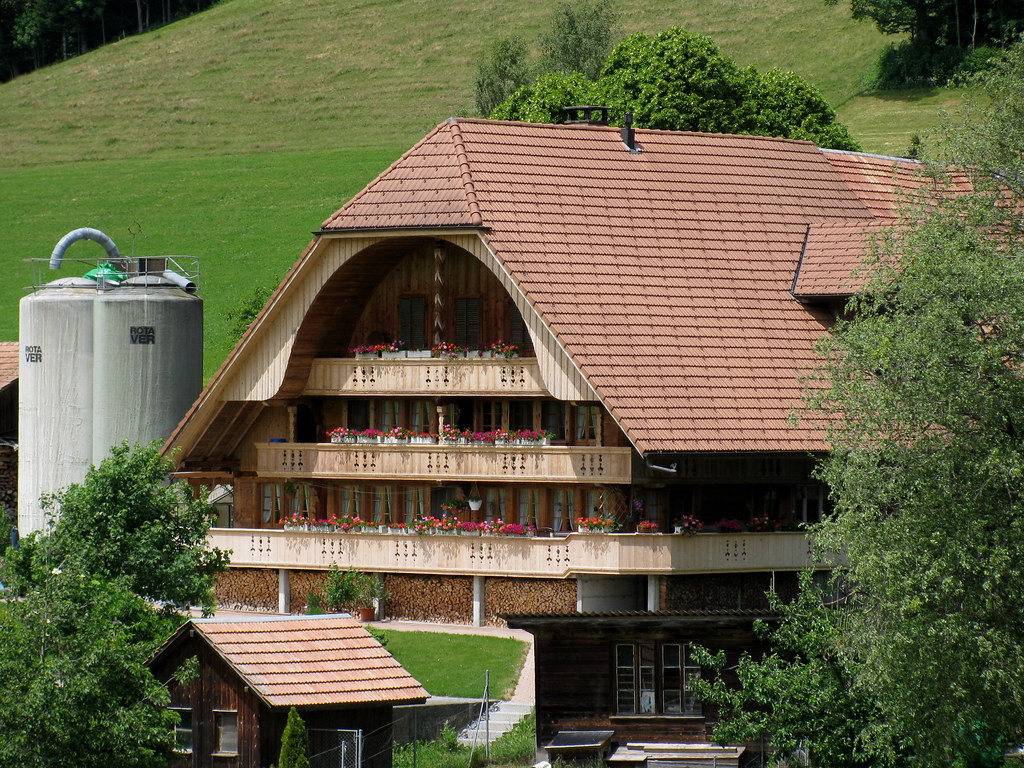 a particularly huge bauernhaus with posts under the balconies 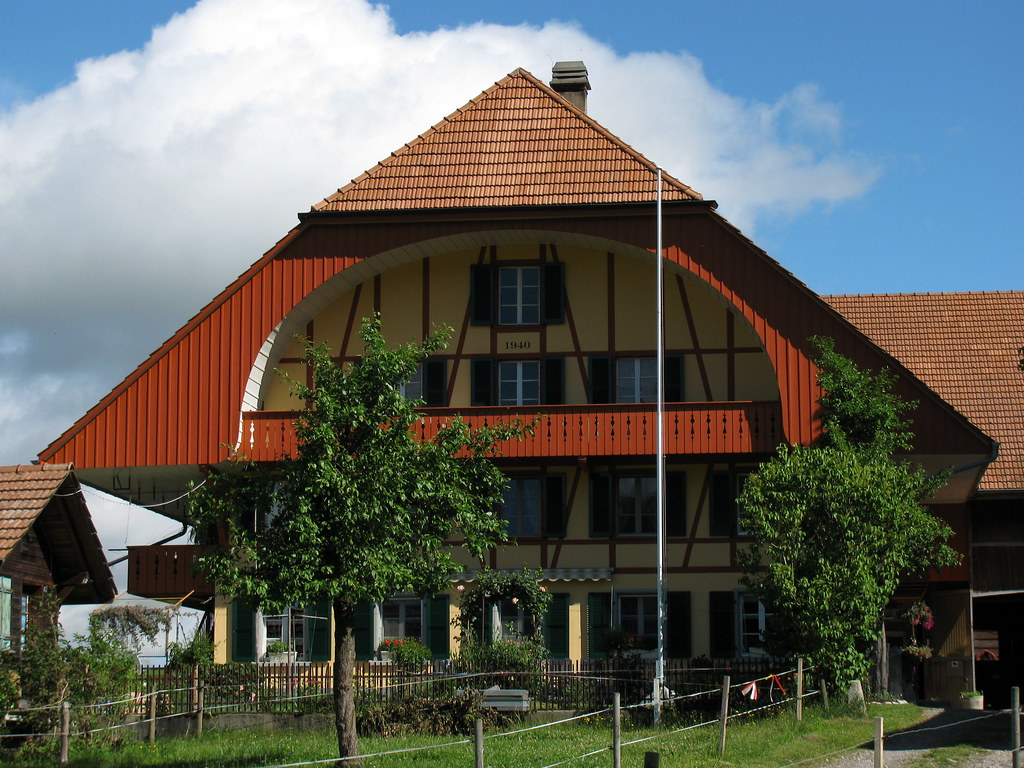 a particularly huge bauernhaus without balcony posts. Also notice the date on this timber framed structure, 1940 What I am considering at this point really is whether to have posts from the balcony to a purlin under the eaves, or to have a purlin that is supported by angled braces, or to not have a purlin there at all. The rafters are spaced 2' OC as stated earlier, and will either be 2x6 or 2x8, depending on a number of factors I have yet to work out. From what I have seen, all three options are used, with overhangs far greater than what this building will have. It just concerns me though to have an overhang that big with no support. 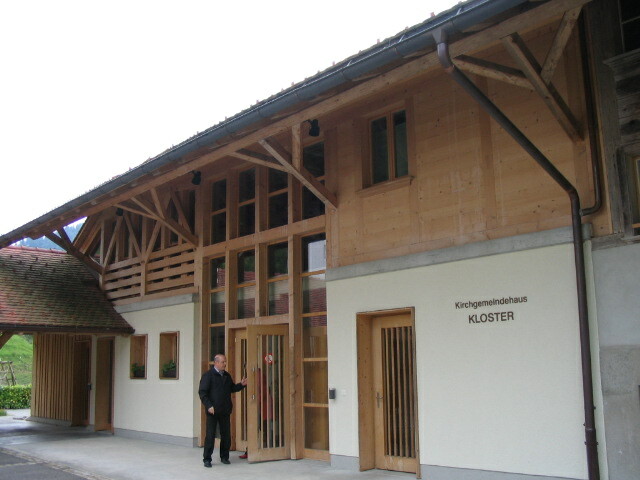 Here is an example of a purlin supported by canted braces I suspect that this whole top heavy issue is where the Ründi, the round projection at the gable, comes from. It is described firstly as preventing a draft from coming under the roof, but it also is said to protect the building from a strong wind that might come along and tear off the whole roof of the structure. This makes a lot of sense when you consider a structure with a roof that is overly large
Last edited by D L Bahler; 08/24/10 02:35 AM.
|
|
|
|
Re: Das Riegelhaus Project
[Re: D L Bahler]
#24276
08/24/10 02:44 AM
|
Joined: Nov 2006
Posts: 850
mo
Member
|
|
Member
Joined: Nov 2006
Posts: 850 |
Very interesting about the Rundi!
Nice pictures! Thanks.
|
|
|
|
Re: Das Riegelhaus Project
#24278
08/24/10 06:06 AM
|
Joined: Mar 2002
Posts: 961
Ken Hume
Member
|
|
Member
Joined: Mar 2002
Posts: 961 |
Hi DLB,
I would appreciate if you would append proper acreditation when posting scanned drawings from books (?) This is not only polite but it will also gives us all the opportunity to investigate Germanic framing further at our liesure.
You do not specifically mention but I am assuming that your design is based on using platform framing ? If yes then this should have a significant effect upon whether ot not cantilever supports can be safely employed.
Regards
Ken Hume
Looking back to see the way ahead !
|
|
|
|
Re: Das Riegelhaus Project
#24284
08/24/10 03:26 PM
|
Joined: May 2010
Posts: 946
D L Bahler
OP
Member
|
|
OP
Member
Joined: May 2010
Posts: 946 |
The drawing is taken from: http://www.fachwerklehrpfad.de/10.0.htmlThis website gives a summary of the development of medieval German framing. However the drawing I believe comes from somewhere else as it is reproduced here with low quality (The copy I printed I went through and rewrote the labels so they would be legible) AS far as pictures go, most of them are credited to J B Dowse (jbdowse.com) either from his website or from other pictures that he has given me. Others are from the Ballenberg Museum, and some are from google searches or resources like www.Fachwerk.de Ken, by platform framing are you referring to framing each story individually, and not using long posts that extend the whole height of the structure? If so, then yes. Platform framing can also be used to refer to a type of stick framing, or to stick framing in general. http://www.hs-zigr.de/umgebindehaus/uebersicht/konstruktion/fachwerk.html is also a good resource. as is http://www.fachwerklehrpfad.de/3.0.htmlThese have the disadvantage of being in German, so google translate might be helpful... Geschossbauweise is the older style in Germany, it is where the posts frame both the ground floor and the upper floor. Also called Ständerbauweise 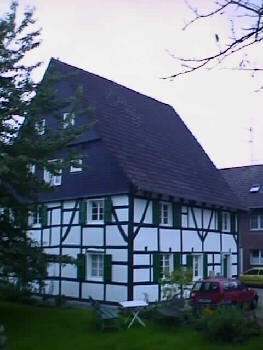 Stockwerksbauweise is where the construction of the ground floor and the upper floor are separate. My building would be Stockwerkbau. Also called Rähmbauweise Also http://www.modellbau-quedlinburg.de/mbq/cms/front_content.php?idcat=142 has diagrams of just about every joint
Last edited by D L Bahler; 08/24/10 03:29 PM.
|
|
|
|
Re: Das Riegelhaus Project
#24285
08/24/10 03:45 PM
|
Joined: May 2010
Posts: 946
D L Bahler
OP
Member
|
|
OP
Member
Joined: May 2010
Posts: 946 |
As far as books go, I have as of yet been unable to find anything in the English language other than material that briefly passes over the style. I can find things in German, and they generally cost quite a bit too. That's part of the reason for my study is to open up this technique to us Americans, because it is a big part of our heritage -there are buildings all over this country that were built in this style by German Immigrants.
Oh, and you English chaps are invited too!
That, and the fact that I find different traditions interesting, and I am of the opinion that we should not limit ourselves. We are in a unique position that we can take inspiration from cultures all over the world. There have already been many who have studied Asian framing traditions, for example.
|
|
|
|
Re: Das Riegelhaus Project
#24290
08/24/10 08:14 PM
|
Joined: May 2010
Posts: 946
D L Bahler
OP
Member
|
|
OP
Member
Joined: May 2010
Posts: 946 |
 Here is a drawing I created this afternoon, a perspective view of the building. A view like this gives you a better idea of how the building will look than an elevation view will. This view shows clearly the wraparound balcony, decorations cut into the balcony boards, typical of the Swiss style, and the Ründi. It also clearly shows the wide overhangs and the half hip roof. Right now I am busy working away at trying to determine timber sizes. I have figured that the main frame of the building will require somewhere around 270 pieces of wood, most of which will be hand hewn. That seems a lot more reasonable when you consider that many of those are only about 4 feet long and maybe 4 inches square or so, and many of the pieces can be cut from longer lengths of timber. So far what little calculating I have done shows that I will be just fine using some surprisingly small sized timbers, which is an advantage of this system. That's attractive to me especially considering that I will be hand hewing so many timbers, because I find it much easier and faster to hew smaller timbers. In addition, it allows me to use smaller trees, like those culled from a good stand, and other trees that are otherwise worthless for lumber.
|
|
|
|
Re: Das Riegelhaus Project
#24303
08/28/10 05:01 AM
|
Joined: May 2010
Posts: 946
D L Bahler
OP
Member
|
|
OP
Member
Joined: May 2010
Posts: 946 |
I have a question about spacing.
First, I am trying to determine what would be the best spacing to use for the decking timbers (which function as joists and in the case of the roof decking as ties as well) It has to be something that divides evenly into 24 feet (or 288 inches), and it would be nice if it also divided into 12 feet, giving me a tie above the middle post on the long walls allowing me to do some bracing there. The posts are 6' OC.
This gives me 3 reasonable options that fit both of my requirements, 24", 36" and 48" spacing. All 3 spacings fit reasonable into the #1 requirement of fitting the tradition, but I don't know which would be the most practical. Remember that standard flooring material will not be used here. The floors will be boards of either cottonwood or pine.
I think that for the bottom floor, which will be used as a shop and therefor have the heaviest traffic and most weight, I will have the joists on 32" spacing. This floor won't be anywhere braced to the posts, so I only need something that goes into 24 feet.
Any other things you notice that you think should be altered, please tell me! Trying to build entirely in a very different style is a challenge! Let alone if your best sources on that style are photographs and articles and descriptions written in a language that is not your native tongue...
About that, though, I have uncovered the following regarding Timber Framing in the German-speaking world, or those regions of the world that once fell under German cultural influence (such as was under the rule of the Holy Roman Empire, or of the Hapsburgs)
Whereas I once thought that Fachwerk was a term that could be applied to all timber framing, this is in fact not apparently the case. There are several classifications in German that we would mostly lump into Timber Framing.
fachwerhbauweise is a term that refers to the classic half timbered structure. It has to half infilled panels to be fachwerhbau
Ständerbauweise is more along the lines of what we think of when we think of timber framing. It is building with tall posts that reach from the bottom sill all the way up to the roof. It was developed during the middle ages and had replaced pfostenbauweise, or pole building, by the 13th century. It was developed as a superior system because the posts were not set in the ground, and it could be better braced.
Rähmbauweise which is the technique where any framework is only one story high. This was developed in the late middle ages and was prominent by the turn of the 16th century.
a fachwerkhaus could be in either style. If it is not fachwerk, then it might instead be..
Bohlenständerbau which has horizontal boards or planks between the posts fitted into vertical grooves, or...
Blockständerbau which has thick wood panels that might be nearly as thick as the posts themselves inserted in a similar manner.
or you might clad them in boards, which I don't know what the term for that would be...
the words Fachwerk or Fachwerkbau in German can refer to timber framing in gerneral, but a fachwerkhaus is a timber building with exposed timber and infill.
The word Holzbau, which means wood building, can also be used to refer to timber framing.
then things just get really complicated from there with regional diversity, such as the fact that the Swiss call a Fachwerkhaus a Riegelhaus, and that every village in South Germany, Switzerland, and Austria has its own dialect that might not be mutually intelligible with other German speaking people... (I can speak one such dialect, but can't read High German very well, and can't understand what most Swiss are trying to say half the time)
Last edited by D L Bahler; 08/28/10 05:09 AM.
|
|
|
|
Re: Das Riegelhaus Project
#24304
08/28/10 06:48 AM
|
Joined: Mar 2002
Posts: 961
Ken Hume
Member
|
|
Member
Joined: Mar 2002
Posts: 961 |
Hi DLB,
3 x 16 = 48.
Regards
Ken Hume
Looking back to see the way ahead !
|
|
|
|
Re: Das Riegelhaus Project
[Re: D L Bahler]
#24305
08/28/10 04:06 PM
|
Joined: Jan 2008
Posts: 918
bmike
Member
|
|
Member
Joined: Jan 2008
Posts: 918 |
DL, wasn't /isn't this building being designed with 'the wheel'? Why worry about math?
Seriously... I'm wondering.
Or are you copying a design with 6' posts and need something that will work?
|
|
|
|
Re: Das Riegelhaus Project
#24306
08/28/10 04:30 PM
|
Joined: May 2010
Posts: 946
D L Bahler
OP
Member
|
|
OP
Member
Joined: May 2010
Posts: 946 |
It is designed with geometry, but not with the daisy wheel. The front elevation was drawn using Ad Triagulum, which is best suited for such and of which the wheel is a form. The floor plan however was drawn using Ad Quadratum, because that works best for floor plans.
All the measurements corresponding to 24", 32", 36", and 48" are yielded by the geometry, I am just trying to decide which one will work the best. So I present the measurement because it is easier for us to understand and because we are trained to think in those terms.
When devising these measurements, I used my dividers and stepped them off to see how well they would work. Then with the ones that did work I measured them with a ruler to find their measure in inches.
Geometry will mostly yield measurements that come out to nice even feet or inches, but now and then there are those oddball irrational numbers...
|
|
|
|
Das Riegelhaus Project: Tjæremile
[Re: D L Bahler]
#24418
09/19/10 01:24 AM
|
Joined: May 2010
Posts: 946
D L Bahler
OP
Member
|
|
OP
Member
Joined: May 2010
Posts: 946 |
Today I began construction of a TjæremileA Tjæremile is a Tar making pit (the word is the traditional Norwegian Term) This style of pit is built into the side of a hill, with a framed pit and a small building projecting out of the hillside. This is just one way to build the pit. Sometimes they are pits dug in the ground by a steep hillside with a pipe run out through the side of the hill to collect the tar. Sometimes they are built half in the side of a natural hill with a complete artificial hill built on the other side. As said, this style has a hut structure built on the downhill side. The structure will be completely covered with a thick layer of dirt, and will provide a platform to walk around an inspect the pit from all sides, which is absolutely vital during firing. The pit itself will be coated with a thick clay to ensure it is both smooth and airtight. The bottom of the traditional kilns in Norway are covered with birch bark in such a way as to let the tar all run down into a pipe located at the bottom. The wood is stacked in a special way in the kiln as well to encourage the tar to run down to the pipe. The stacked wood is covered with a layer of sticks, leaves, grass, straw, or whatever and then covered with dirt, sod, or peat to seal it off from the air. A ring is left uncovered at the bottom which is used to light it and control the air intake while firing. here are some pictures of what I have. I have the wooden support structure nearly completed (worked on it by myself for about 5 hours this afternoon) and it's about ready to be covered over with dirt and the pit coated with a good thick heavy clay. The pipe coming out of the bottom will be a strip of hickory bark taken from a tree I cut this summer, that I could take large sections of bark from. They rolled up into nice round tubes.  making the support frame. all of the wood is cut from within a few hundred feet of where the pit is built. The wood is about all sitting on rocks to prolong the life of the kiln, even though it is only intended to be a temporary structure.  making the pit support structure. It consists of leaning uprights with small willow sticks woven between them. It is REALLY hard to weave a good sound structure that is small and round. But I figured out a good reliable method after a while that worked well, and made a very rigid framework.  top view of the completed pit frame.  front view of support structure with pit frame.  putting a roof/floor on the frame. This is made of several layers of wood. Good, sound, fresh cut wood on the bottom with a few layers of old dead stuff on top. This will be covered with leaves and sticks and then with dirt that will be seeded with grass to form a sod top. It's not meant to be waterproof so much as provide a good framework for an artificial 'ground' The uprights for the pit will be trimmed off later.  side view of the (nearly) completed framework.
|
|
|
|
Re: Das Riegelhaus Project: Tjæremile
[Re: D L Bahler]
#24419
09/19/10 06:36 AM
|
Joined: Mar 2002
Posts: 961
Ken Hume
Member
|
|
Member
Joined: Mar 2002
Posts: 961 |
Hi DLB, I have posted a thread on the Green Woodworker website forum in the UK to try and establish the use of a pit dug into a hillside slope in my woodland. This can be seen at :- Woodland hillside pit Your post above has now got me thinking that this pit might well not be anything to do with sawing lumber as previously assumed. Instead, this could well be a small production set up for making pine tar. I have found no evidence of a pipe in the lower part of the pit but since this is currently filled with broken beer bottles and cans this might well be a possibility. You can check out the full post at the Bodgers website to check out the story so far :- http://www.bodgers.org.uk/bb/phpBB2/viewtopic.php?f=15&t=1483Regards Ken Hume
Last edited by Ken Hume; 09/19/10 06:37 AM.
Looking back to see the way ahead !
|
|
|
|
Re: Das Riegelhaus Project: Tjæremile
#24420
09/19/10 11:09 AM
|
Joined: Dec 2007
Posts: 1,882
TIMBEAL
Member
|
|
Member
Joined: Dec 2007
Posts: 1,882 |
I saw pictures of the Gardener's Shelter at Cressing Temple in the video at the end of the bodgers link, a geometrical designed building. A nice thread to follow.
Ken, have you dug into the pits to see what if anything resides in the pits? Sawdust, char, pottery remains. I have found what appears to be charred remains of timber logs and pottery in the two pits at my place. The charred poles may just be a stage of deterioration in my case, but pottery for sure. I am calling my pits some kind of storage facility, a root cellar.
Tim
|
|
|
|
Re: Das Riegelhaus Project: Tjæremile
#24421
09/19/10 01:12 PM
|
Joined: May 2010
Posts: 946
D L Bahler
OP
Member
|
|
OP
Member
Joined: May 2010
Posts: 946 |
If it is a tar pit or charcoal pit, there should be a a noticeable layer of charcoal somewhere at the bottom. From what I understand, that is how they identify the old pit locations in Scandinavia is by digging under them to find charcoal.
The coal should be more than just some scattered bits and charred ends, it should be a complete layer. When you clean out the kiln after a firing, it is impossible to remove all of the fines and dust, so it gets left behind.
|
|
|
|
Re: Das Riegelhaus Project: Tjæremile
[Re: D L Bahler]
#24423
09/19/10 04:10 PM
|
Joined: Aug 2009
Posts: 306
Cecile en Don Wa
Member
|
|
Member
Joined: Aug 2009
Posts: 306 |
Hi, here is a little film of how we did it a while back in Sweden. And then some more descriptive pictures of the process here. though, you know, tar was mostly produced for ship and boat building with maybe some other minor uses on the side like healing hoofs. The timmerman I spoke with in Sweden told me the only thing he knew of it being used for otherwise was sometimes coating the mud sill. I put it on our barn knowing that it is not particularly durable and will require frequent maintenance which I don't mind 'cause I like working with it. I also use it to cover m' shoes Greetings Don
|
|
|
|
Re: Das Riegelhaus Project: Tjæremile
#24424
09/19/10 04:26 PM
|
Joined: May 2010
Posts: 946
D L Bahler
OP
Member
|
|
OP
Member
Joined: May 2010
Posts: 946 |
Tar was definitely used to cover buildings in Scandinavia during the middle ages, as is attested by the Stave Churches. they are all coated with pine tar, and most are apparently recoated every 10 years or so. Tar was definitely used for boats, and that was its primary use by the 1800's or so. I suspect there may have come a time when people didn't want their houses to smell like pine tar any more, and so its use as a buildings preservative may have likewise died out. There are also buildings from Germany and Central Europe that are likewise sealed off with tar, in fact sealing timbers with tar may be the origin of the tradition in many Germanic regions of painting exposed timbers dark brown (there are a few areas that paint them dark red instead)
Don, the process shown there is a more modern variation. Things I have come across written by Norwegians, Swedes, and Finns who still do this in the pit claim that the pit method yields a higher quality tar than is yielded by indirect pyrolysis (which is what you are doing there) That said, that's still good work, and I'm not entirely convinced (although I do not have enough info to come to an informed decision) that there is any significant difference. From what I have seen, they claim the chemicals present exist in a different ratios depending on whether the wood was burned directly or indirectly. Pine tar burned in a direct burn pit apparently contains higher levels of turpentine, for example.
It is also best to hunt down wood with natural preservative properties to use in the kiln. In the old method, pine trees would be scarred extensively because this causes them to produce a special preservative sap. Nowadays in Norway (since that method is illegal now) they use the roots of pine trees, because they contain more preservatives and more sap, and they are leftovers from logging operations.
Here in Indiana, I would choose wood like walnut, black cherry, locust, mulberry, Osage orange, white oak, and others that are high in tannins or other natural preservatives. The goal is to create a tar with as much chemical preservative as possible, and so the choice of wood is important.
|
|
|
|
Re: Das Riegelhaus Project: Tjæremile
#24425
09/19/10 04:35 PM
|
Joined: May 2010
Posts: 946
D L Bahler
OP
Member
|
|
OP
Member
Joined: May 2010
Posts: 946 |
Pine and other softwood tar is high in turpentine, the higher the turpentine the better it is.
Hardwoods tar is instead high in wood alcohol and tannic acid, which are both highly preservative agents. Like turpentine in softwoods, the more wood alcohol you can get the better. Tannin content is related to the wood species, while alcohol content is related somewhat to species but mostly to the process.
It is important to remember that distilled wood alcohol is a deadly poison. However, dissolved in tar it is essentially denatured, to the extent that hardwood tar, like pine tar, is safe to eat (it is the flavoring component of liquid smoke products) and is safe to apply to your skin (hardwood tar is supposed to be an effective remedy for psoriasis, which due to the fact that nobody makes it in large quantities it is replaced in this function with coal tar produced as a byproduct of coke manufacturing)
I would like to get my hands on a large quantity of rather sappy pine (which I'm just not going to get locally) to make some pine tar to compare with hardwood tar.
|
|
|
|
Re: Das Riegelhaus Project: Tjæremile
#24426
09/19/10 05:13 PM
|
Joined: May 2010
Posts: 946
D L Bahler
OP
Member
|
|
OP
Member
Joined: May 2010
Posts: 946 |
This website: http://www.mollis.no/tjeremile/TjereStartSide.htm might be of interest. It is a traditional tar pit in Norway, showing the full operation from preparing the pitstead, loading the wood in a special manner, covering, and buning. This pit is a bit larger than mine. It should be clarified that the basket framework I have constructued is only going to be the bottom about of the pit itself. The other half will be an earthen-walled formation on top of the frame.
|
|
|
|
|