Previous Thread
Next Thread
Print Thread
Rating: 4
Page 2 of 2 1 2
Re: Scarf joints for beginners. Design and placement [Re: TIMBEAL] #29911 12/11/12 02:47 PM
Joined: Jun 2010
Posts: 49
D
danfink Offline OP
Member
OP Offline
Member
D
Joined: Jun 2010
Posts: 49
Thanks!

I surely can detail that situation well, and if making sure everything fits properly is what I have to worry about, then I'm golden. I just wanted to make sure I wouldnt be removing too much wood from the post . . .

Thanks again!

Re: Scarf joints for beginners. Design and placement [Re: TIMBEAL] #29913 12/11/12 02:58 PM
Joined: Mar 2002
Posts: 1,692
J
Jim Rogers Online Confused
Member
Online Confused
Member
J
Joined: Mar 2002
Posts: 1,692
Dan:
If you're housing the two braces with 1/2" housings and the tenon is 3" long then there will be a gap between the two tenon ends when you put them into the through mortise created for both tenons.
These means they should hopefully never touch.


You have shown a 8x8 hemlock plate. And usually I like to make the overlap of the scarf 3 times the depth. So that would be a 24" overlap. Jack Sobon told me once he likes to use a 4 times depth overlap. That would make it 32", and a longer slope.

One way I figure the location is by the length of the timber.

Like this:


Now you can see that the long piece of the plate will fit into a 16' timber which I would imagine you can locally acquire. And that the short piece of the scarf will fit into a 10' piece.
10' + 16' = 26' less 2' for scarf = 24' leaving 6" off extra length to trim off to get a 23' 6" plate.

After your scarfs are cut and the timber is pulled up (joined by the scarf) and ready you then layout your post and braces locations.

If you're doing a 3' brace layout you should be ok, but I haven't drawing it exactly to be sure.
You can always make the center two braces a little shorter in the layout if you feel that the brace is too close to the end of the scarf.

Hope that helps.


Whatever you do, have fun doing it!
Re: Scarf joints for beginners. Design and placement [Re: Jim Rogers] #29920 12/12/12 03:56 AM
Joined: Jun 2010
Posts: 49
D
danfink Offline OP
Member
OP Offline
Member
D
Joined: Jun 2010
Posts: 49
So helpful Jim!!!

Thanks so much!

Dan

Re: Scarf joints for beginners. Design and placement [Re: Jim Rogers] #29929 12/12/12 03:41 PM
Joined: Jun 2010
Posts: 49
D
danfink Offline OP
Member
OP Offline
Member
D
Joined: Jun 2010
Posts: 49
Jim (and anyone else),

I think I'm going to do a Stopped Splayed Scarf with Wedges (like what you show in your photo). Or, as Sobon calls it: Stop-Splayed, Undersquinted and Tabled with Wedges. Here's some image I found of one online:


In Benson's book Building the Timber Frame House he has some great instructions to make a plywood template for this joint. I'm planning on creating a template similar to how he suggests it (I may make my splay longer than he recommends if my timber lengths allow for it).

[img]http://www.flickr.com/photos/danielcha/8267421970/sizes/l/in/photostream/[/img]

Any pieces of advice on the layout or cutting procedure for this joint?

Thanks for all your help!
Dan

Re: Scarf joints for beginners. Design and placement [Re: danfink] #29937 12/13/12 03:17 PM
Joined: Mar 2002
Posts: 1,692
J
Jim Rogers Online Confused
Member
Online Confused
Member
J
Joined: Mar 2002
Posts: 1,692
If you are laying this out on some rough sawn timbers using square rule layout, you'll have to pull all your measurements from the top down.

And not just rely on the bottom for your 45° angle cuts to make the "under squinted butts".

Like this:
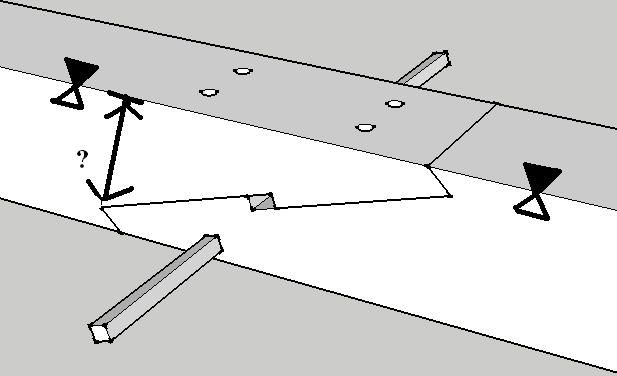


That way if one timber is 1/8" larger then the other it won't matter.

In my version of your picture, I added two filled in triangles to show the reference face and edge, and two open triangles to show the adjacent face pointing to the reference edge.

This is the point or edge I pull all my dimensions from and when I did that then the joints were easy to layout and cut.

As I had several to do, I tested different methods of cutting them.

First, I did the method that is shown in Ted's book with cutting lots of saw cuts with a skill saw. That method worked but it was a lot of work and very time consuming.

Next, I tried something else.

I had a chain mortiser and I wanted to use that to cut out the center or table of the scarf.

So the first thing I did was I cut off the long line:
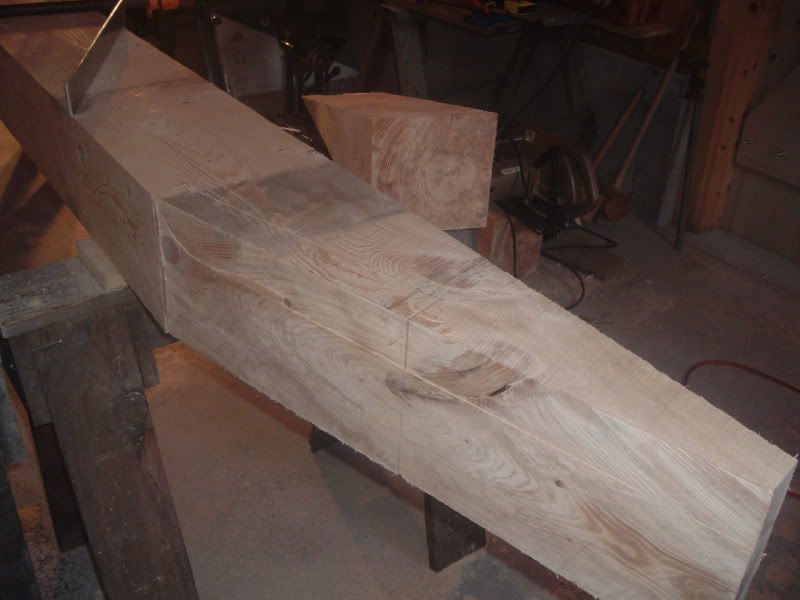


You can see the wedge block on the saw horse in the back.

The next thing I did was I clamped the wedge block back onto the timber so that the back edge was parallel to the table.

Like this:
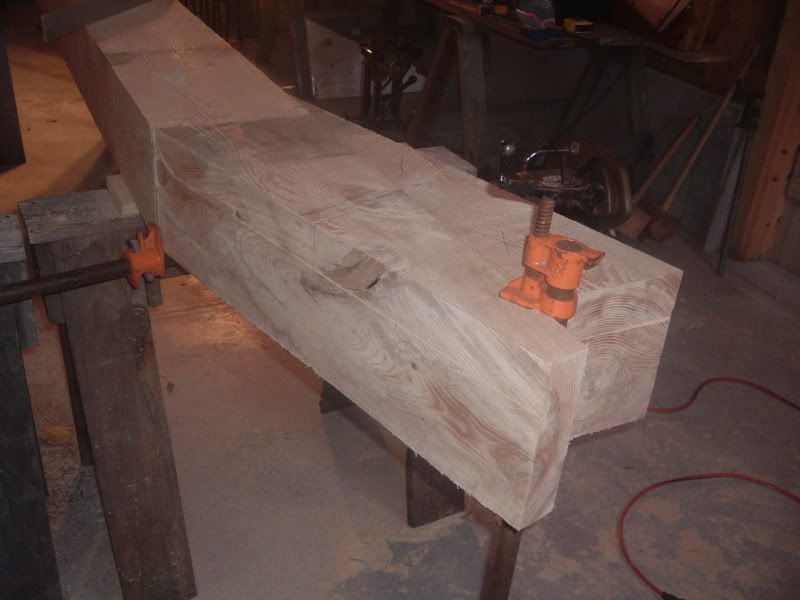


and this:
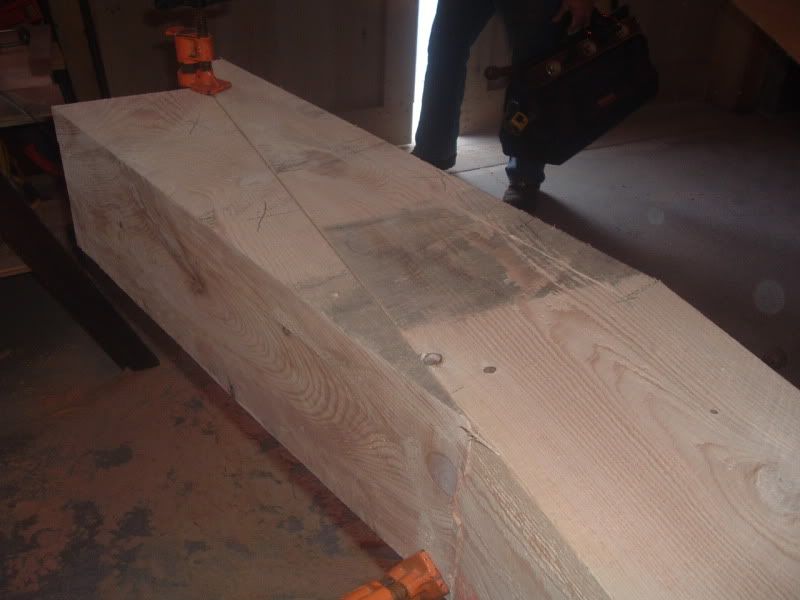


This allowed me to use my chain mortiser to like this:
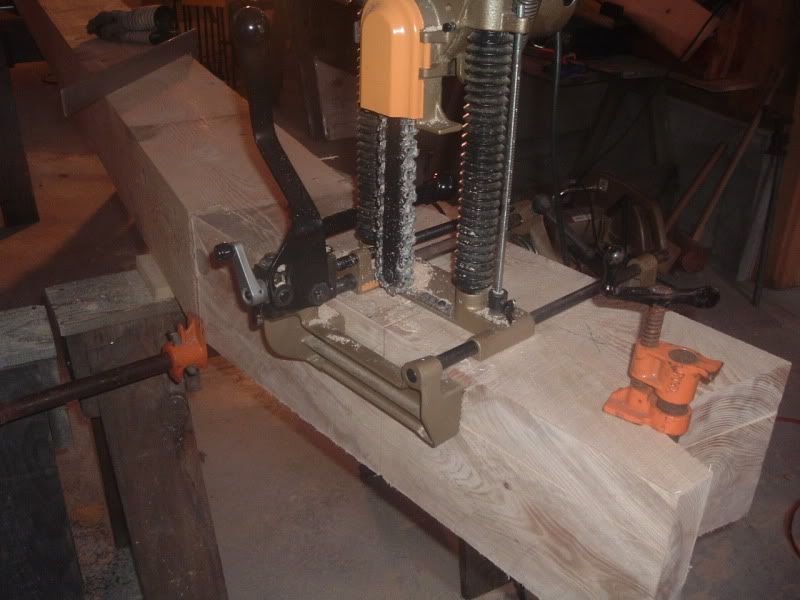


And when I did I was able to remove the entire table area in one big piece:
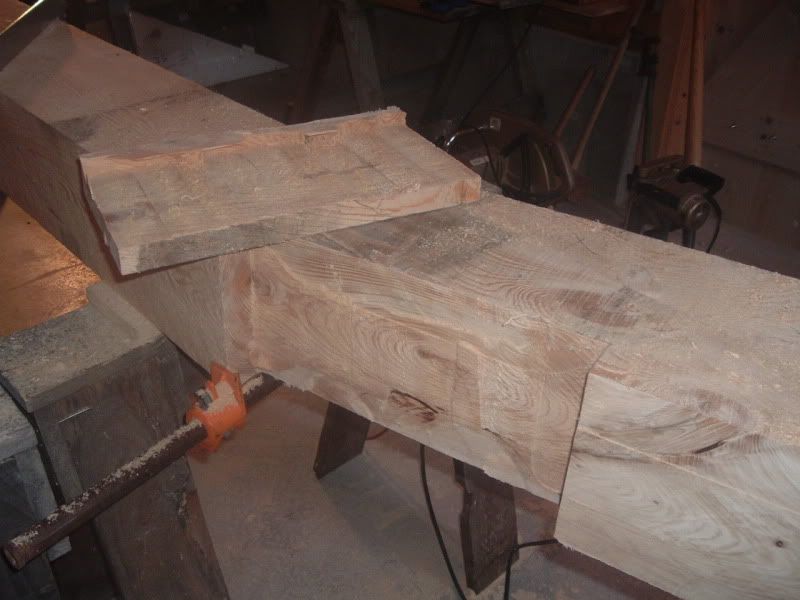


With a little chisel work the half was done:
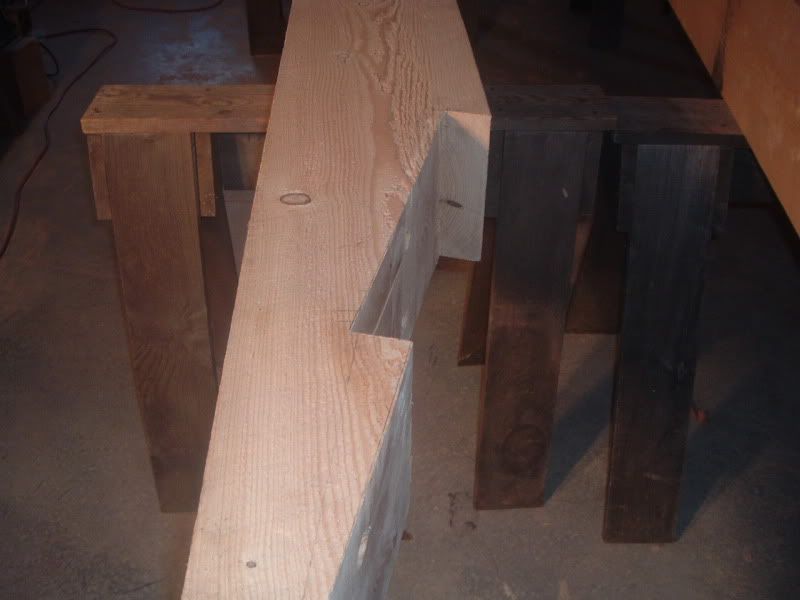


My "under squinted butts" weren't at a 45° angle to the bottom or top surface. But they were 90° to the table surface.

I think if and when I do it again, I would increase the angle closer to the 45° slope.

Hope this helps.

Jim Rogers


Whatever you do, have fun doing it!
Re: Scarf joints for beginners. Design and placement [Re: Jim Rogers] #30003 12/30/12 11:27 PM
Joined: Jun 2010
Posts: 49
D
danfink Offline OP
Member
OP Offline
Member
D
Joined: Jun 2010
Posts: 49
Thanks so much Jim! I cut them using the method Benson describes, as I dont have a chain mortiser, and it went great! We'll be fitting them together and raising them later this week. I'll post photos.

Thanks again!
Dan

Re: Scarf joints for beginners. Design and placement [Re: danfink] #34687 07/18/19 04:46 PM
Joined: Jul 2019
Posts: 7
M
Michael_Hartke Offline
Member
Offline
Member
M
Joined: Jul 2019
Posts: 7
Great info and descriptions everyone! This helped answer scarf questions I recently posted.


Michael Hartke
Page 2 of 2 1 2

Moderated by  Jim Rogers, mdfinc, Paul Freeman 

Newest Members
Che, OldFrank, GeraldSmith, EISENH, ScottEllis
5146 Registered Users
Powered by UBB.threads™ PHP Forum Software 7.7.3
(Release build 20190728)
PHP: 5.4.45 Page Time: 0.145s Queries: 16 (0.062s) Memory: 3.1938 MB (Peak: 3.3996 MB) Data Comp: Off Server Time: 2024-09-18 02:13:26 UTC
Valid HTML 5 and Valid CSS